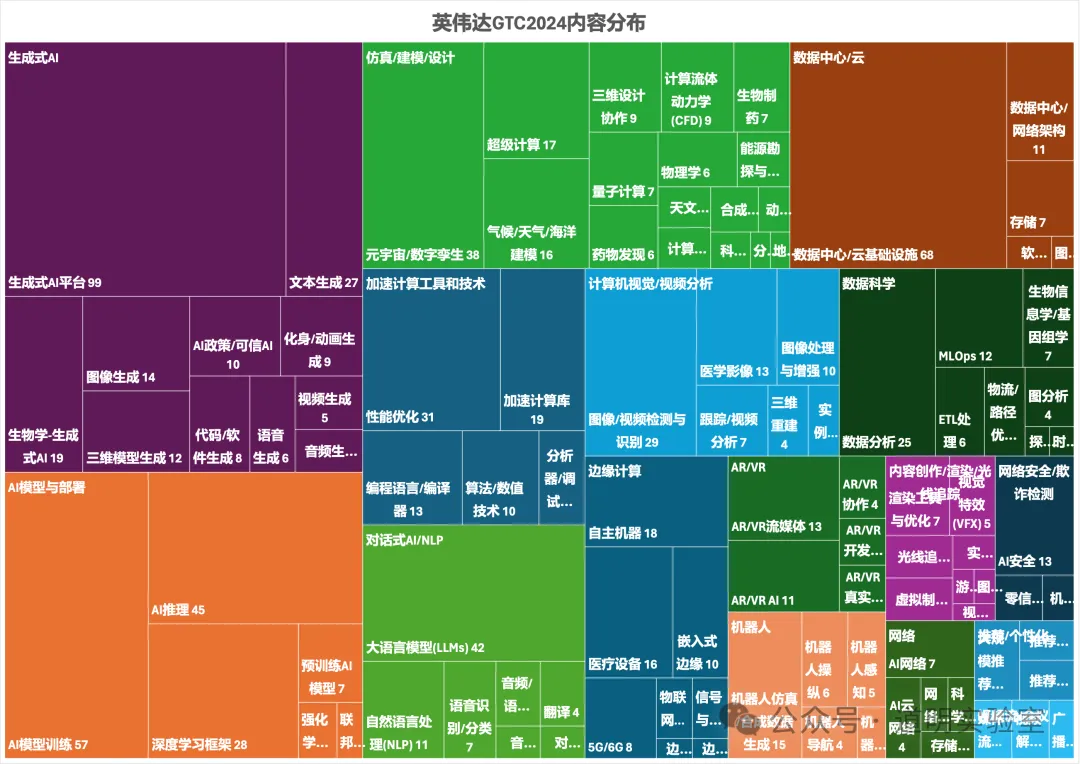
If we carefully examine the content distribution map of the NVIDIA 2024 GTC conference agenda, it is clear that "3D Generation" is everywhere: Generative AI, simulation, computer vision, AR/VR, content creation, robotics...
There is one point in Yann LeCun's discussion about AGI that is almost a universal consensus: we need models to understand the human physical world.
The first step of this "understanding" is to comprehend our 3D world. This point alone is compelling enough.
Furthermore, "3D Generation" holds "disruptive" importance for content creation in scientific research, manufacturing, film, and gaming.
While "3D Generation" has been discussed many times before, people generally find it tedious and distant. Long workflows, numerous tools, and high entry barriers are indeed the biggest problems currently facing 3D generation.
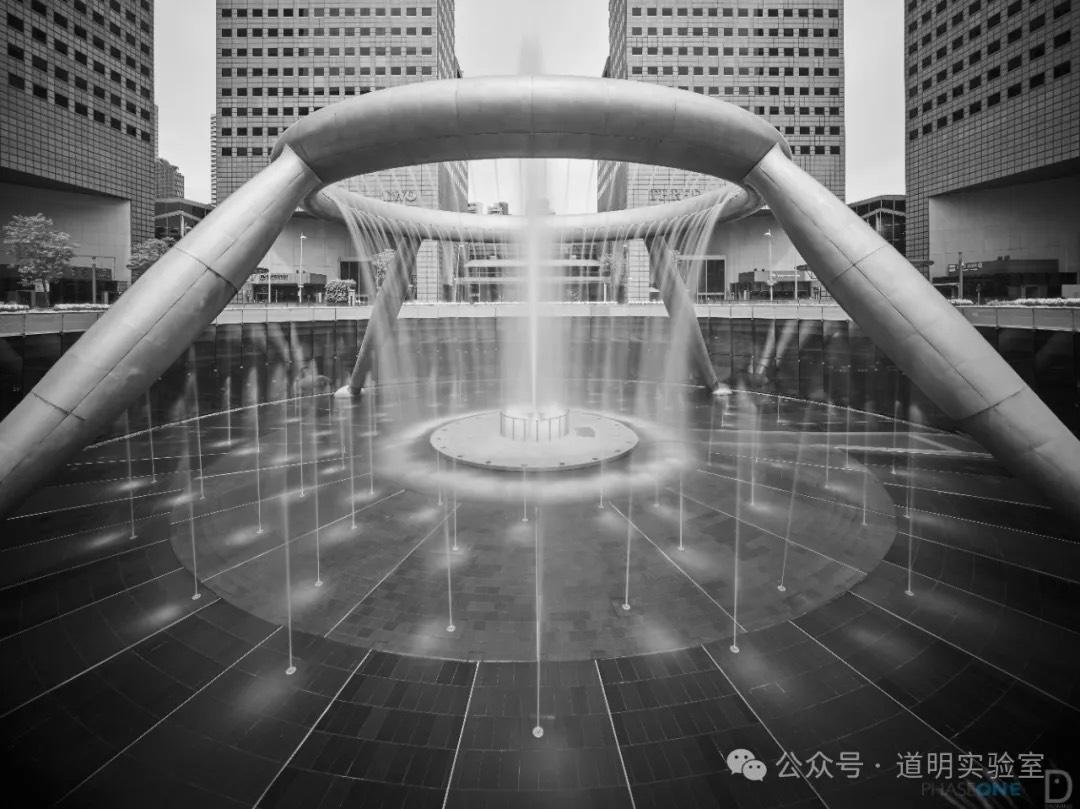
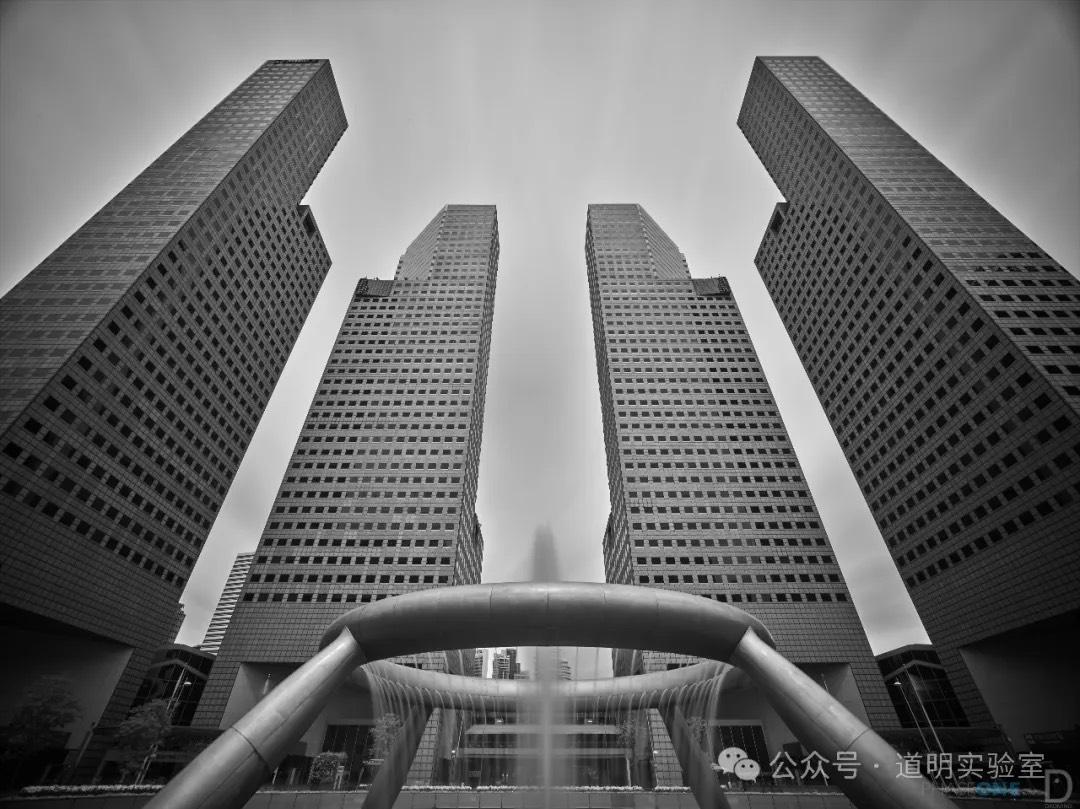
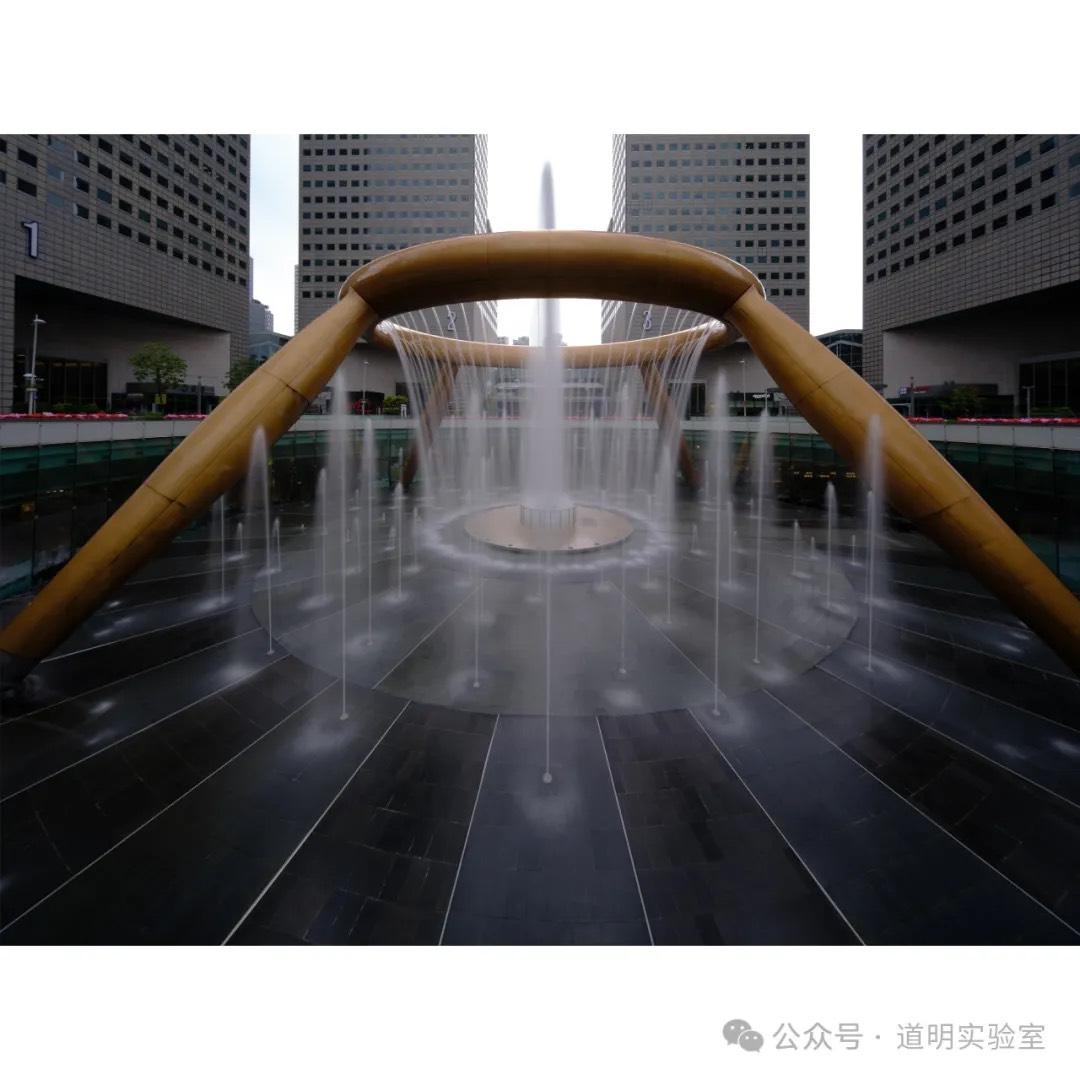
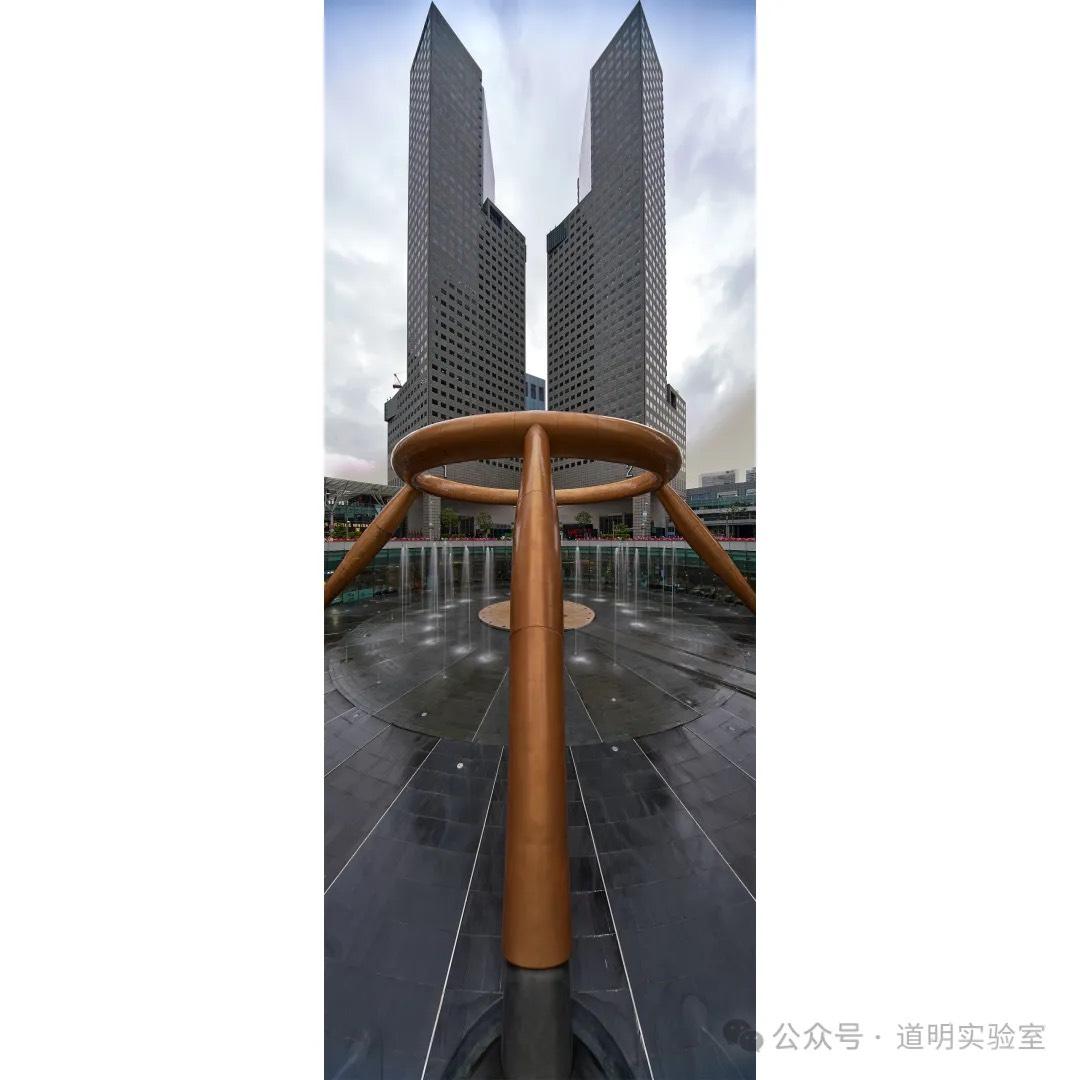
Therefore, I returned to the place where I collected photos for my very first 3D model: the iconic fountain at Suntec City. First, the environment is controllable, making it easy to collect material; second, I wanted to compare the changes in modeling quality over the past year.
First, here are photos I took at this spot at different times using various equipment. Especially for the last one, to capture both the fountain and the office buildings behind it in their entirety, I used a 15mm tilt-shift lens on a Fujifilm medium format camera. I used a vertical composition, maximized the shift in both directions, and stitched them together. On a 135 equivalent, this is a perspective of less than 10mm.
Now, let's move into the modeling workflow introduction.
- Photo Capture
Using a vertical composition, I again used a Fujifilm medium format camera paired with a 20-35mm lens at the 20mm end. This provides a very wide angle while keeping lens distortion minimal (distortion is the "nemesis" of 3D reconstruction). Collection method: There is a 360-degree railing around the fountain. I kept the camera level, walked in a circle, and took shots at equal intervals. The background buildings serve as excellent features to help with spatial alignment.
Thus, I consider this the best place for beginners in 3D generation.

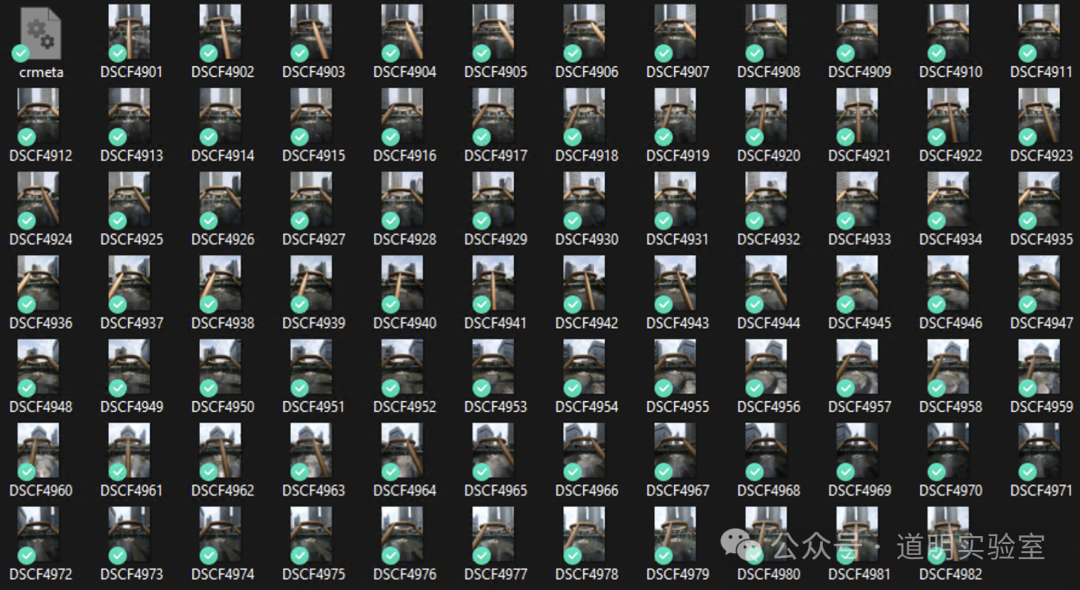
- Photo Organization
Import the photos into a computer and store them in a separate folder. There are 82 photos in total. Since they were taken at equal intervals, the angle difference between any two photos is about 4.5 degrees. The diagonal field of view of this lens at 20mm is 108 degrees, and the short-side view is just under 70 degrees. This ensures a massive overlap between photos, making it clear even before modeling that the golden ring can be continuous.
- Spatial Alignment
This step can be done with off-the-shelf software. I still use Reality Capture by Epic Games (the creators of Unreal Engine), which is currently Windows-only.
Open the software, go to the [WORKFLOW] tab, click the [Folder] button to import photos, and then click [Start]. The process runs automatically.

After some computation, the 3D model is generated. The GIF below shows the result of the sparse model (also known as a point cloud). The interface can also simultaneously show the calculated shooting position and angle of each photo. In this scene, the photos form a complete circle.
- Adjust Reconstruction Area and 3D Rendering
To facilitate subsequent processing and significantly reduce computation, I cropped the 3D space to select only the fountain portion. After rebuilding, the software recomputes. Selecting [Texture] under [MESH MODEL] generates a dense model that can be rendered in real-time.
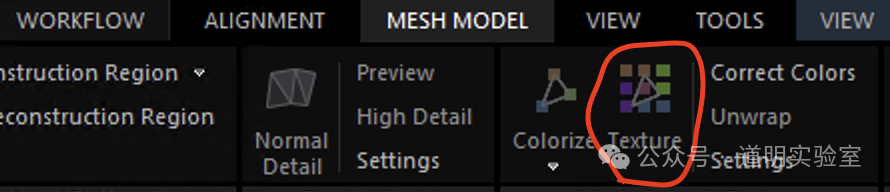
This generation time is longer than the alignment phase, but the image quality is better.
- Exporting to Blender or Game Engines
The model can be exported in .ply or .obj formats and then imported into Blender (an open-source 3D creation suite). From there, various edits can be made:
- Importing to Apple Vision Pro
Regardless of whether it's edited in Blender, the exported .obj or .ply files can be interacted with via applications on Apple Vision Pro. While this type of interaction works well for small-scale models, it can struggle with large scenes, primarily because large scenes require a more immersive experience, which increases the difficulty of app development. However, you can indeed import a simple 3D model like this as a "toy" into the headset for simple interaction:
Due to GIF frame rate limits on WeChat, I could only upload this GIF at a sampling rate of 5 frames per second. The actual experience is much smoother.
And that completes a simple 3D modeling process. For better visualization, I have also linked all the steps above into a short video.
This is only the most basic first step in 3D modeling. To achieve good results, the effort required is far greater than that for a simple photograph. But the feeling of capturing such a vast amount of information is truly wonderful.